As any experienced gardener will tell you, having a greenhouse can be an invaluable tool in the food-growing toolbox. Having a greenhouse at one's disposal opens up many different growing possibilities and can be a huge season extender in areas where the number of good growing days is limited. Greenhouses make it easier to get new seedlings started and help to protect plants from spring and fall frosts. They are a wonderful addition to any resilient garden space. But they can be expensive to put in, and there are many things to consider before getting one set up. Check out the WSID articles on Selecting a Greenhouse and Winter Gardening to get a better idea of the styles and options available.
We put a lot of thought and planning into the design and construction of our DIY greenhouse. With cost being one of the number-one constraints for this project, we did a lot of web surfing and idea gathering. Our research gave us inspiration for materials, styles, and what the end result should be. We found projects that people had built for under $50. At that price, we could build three or four and still be under budget. But we didn't think they would last more that one season or that we would find our greenhouse plastic in the next county after a spring storm. Then there were far fancier and much more well-built ones, but our experiences with major construction and the added cost kept us from these higher-end designs. So we used what we had on hand – pallets, cattle panels, and a bit of new materials to give it good rigidity. We ended up with a Quonset/High-Tunnel-style greenhouse. Estimated Final Cost: $300.00 Final Dimensions: 9' x 12.5'
Considerations for Our Greenhouse Constructions
Cost
Being on a budget (a very tight budget) put cost at the top of our list for considerations for this project. We wanted to maximize the greenhouse growing space while making sure the materials we used would be durable and last multiple seasons. The greenhouse plastic was one of the most expensive components of the project, but with a 4-year life expectancy, it was well worth not using a cheaper option.
Size
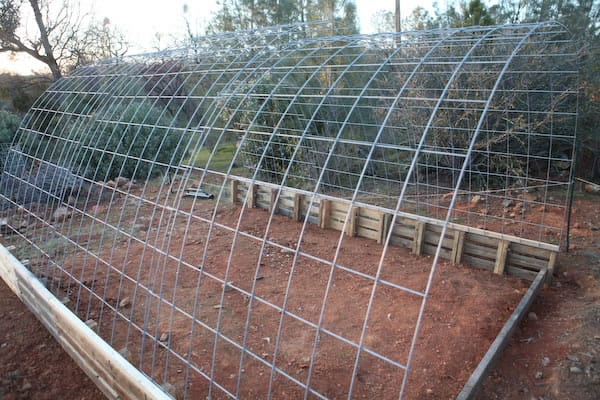
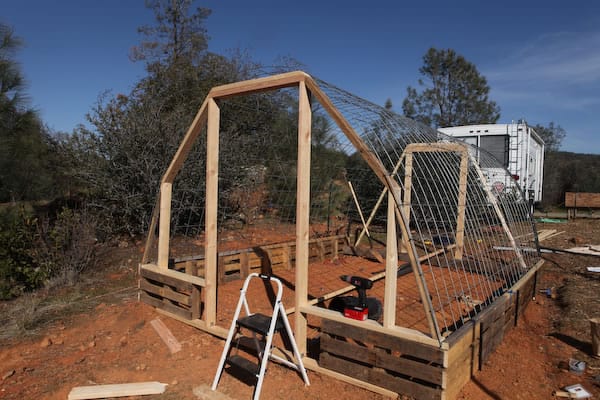
The size of greenhouse was largely determined by the construction materials we had on hand. The big decision for us was how many cattle panels to use. For reference, the panels we had available are 50 inches tall and 16 feet long. We originally were only going to use two panels, but one rule of greenhouses is that you always go bigger that you think you need or want. We all have a tendency to take up our full capacity. So we went with three panels. This gave us 12.5' as the length of our greenhouse. (Plenty long for a small homestead. Big enough for our growing needs.) Then for the width we determined that 9' as the base of our arch gave us about 6.5' of head room once we placed the panels on the mini 13" pallet foundation. You can make the width as wide or as narrow as you like, keeping in mind that too wide a span will not have enough tension in the arch to support itself and a ridge beam will be needed.
Location and Orientation
We recently moved to a new rental home that afforded us plenty of open space to place our greenhouse with full sun on the south facing wall and a few trees to shade during the setting sun in the summer. We did have to dig out and level a portion of the dirt foundation and build up one end to work with the adjacent slightly sloping hill. Once we got the dirt building pad in place, we were able to level and anchor the pallet foundation.
Wind Durability
After viewing the aftermath of high winds on tarps for cattle panel goat shelters, and hearing stories of people chasing their plastic down the field from their PVC high tunnels, we knew that special consideration was needed for the storms and winds we get in our area. We had to make sure that the covering was tight and would not tear in high winds. To accomplish this, we planned on using 1" x 2" wood strips to pull the plastic tight and secure it. We also added protective endcaps (made from 1/2' pipe insulation) on the cattle panel to protect the plastic from puncture holes.
Covering Film
There are basically three types of plastic film that we could have used on our greenhouse. The choices are: 1) a single-season non-UV 6 mil plastic from home depot or other local hardware store, 2) a UV stable 4-year greenhouse plastic, and 3) a re-enforced UV stable greenhouse plastic. The home depot type plastic is very cheap but is really not designed for use on greenhouses and breaks down rather rapidly and can become a huge mess to deal with once it gets trashed. We ended up using the basic 4-year greenhouse plastic and used a special discount coupon from a local farm supply store to purchase the plastic. We were able to cover all surfaces with a 20' x 20' piece.
Venting and Airflow
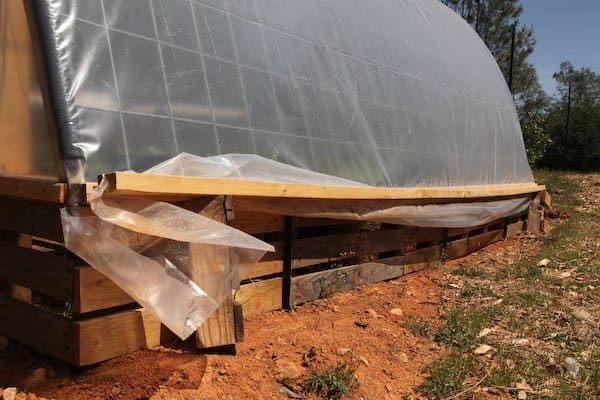
With the base of the greenhouse being constructed out of mini pallets, we were able to incorporate base venting into our greenhouse. We had also planned a front door and a back zip-up door (using a construction site zip door from Home Depot). We ended up not using the zip door and instead added an automatic vent opener and window in the rear of the greenhouse.
The Construction Process
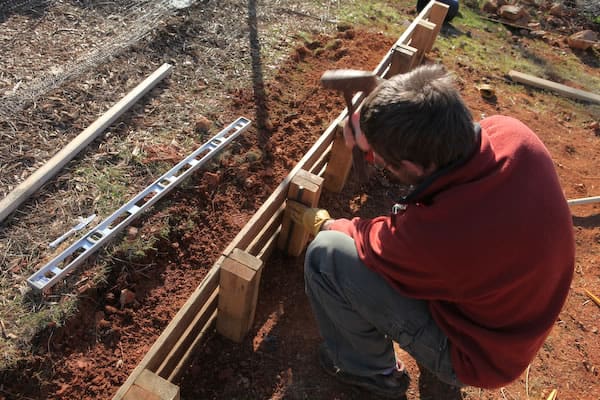
First we selected our spot and leveled our foundation. We were working with a sloping hill in what was becoming our "Back to Eden" garden space, and it took a number of hours to get it level and ready.
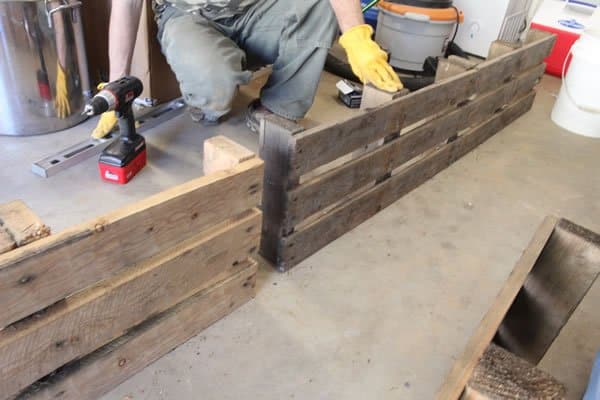
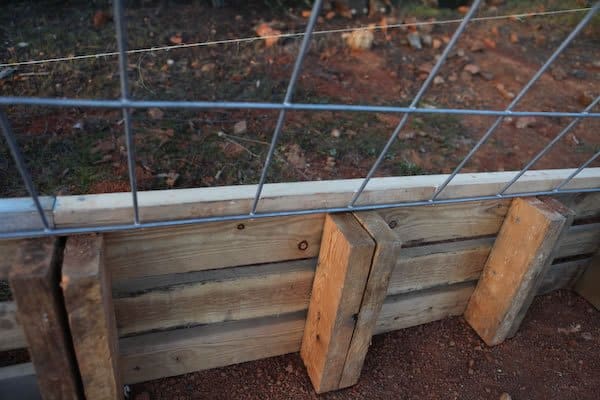
We used mini pallets to build the base of the greenhouse. We screwed them together while they rested on the flat surface of our garage floor. We then carried them out in whole segments to the foundation. Each of our mini pallets measured 13" in length. For our 12.5' greenhouse, we used 12 pallets on each side. This gave us a little bit of excess, which we sawed off later.
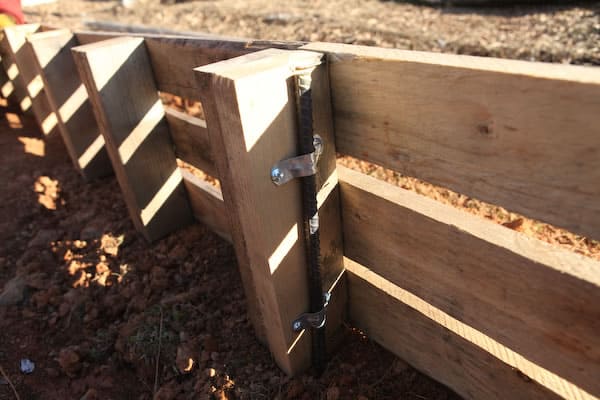
We applied rebar braces pounded into the ground on the inside with conduit straps to secure the foundation to the ground. Didn't want the whole structure to fly away one night. Then we added 3' steel spikes on the outer walls to counter the force of the panels pushing outward.
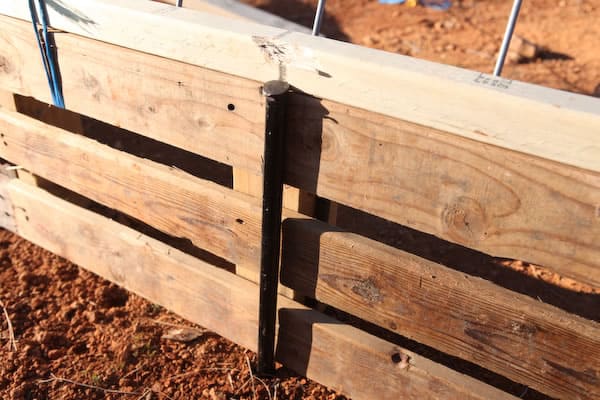
We used a 2x2 board as a bracing beam to hold the panels even, and then used fence staples to secure the cattle panel to the base pallets.
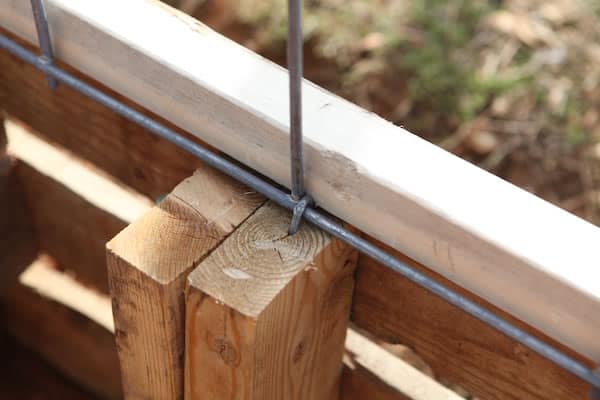
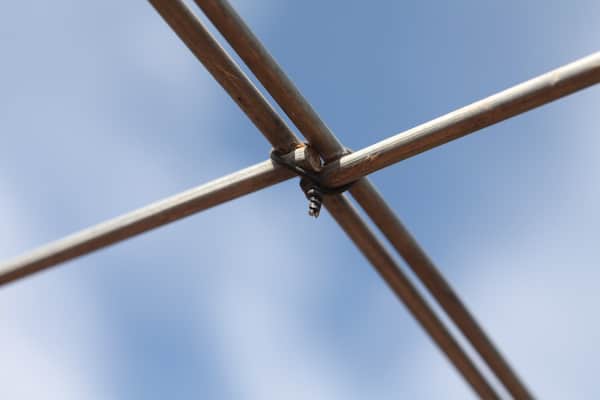
Once all three cattle panels were in place, we used bailing wire to secure the panels together and made sure the cut point faced inward as to not puncture the greenhouse plastic.
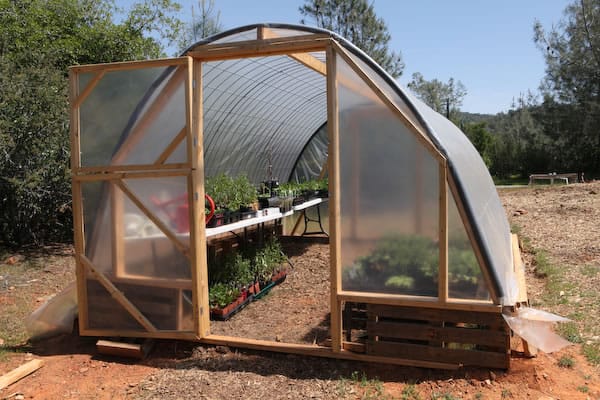
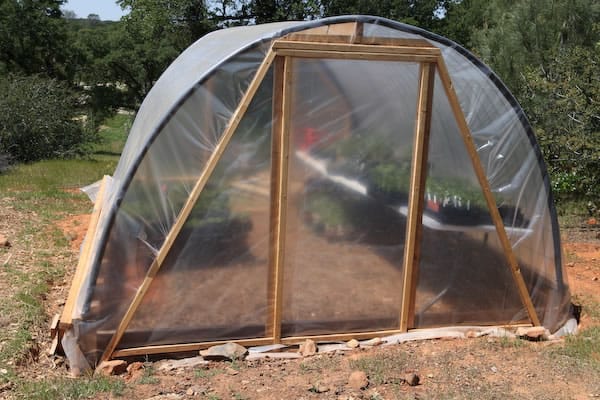
We framed in the front and back end walls. The plastic was then stretched over the ends and secured with 1x2 wood strips to the end wall pieces. This made the plastic very tight and secure.
After the front and back walls were framed, we added pipe insulation to the ends of the cattle panels as a way to help protect the plastic from the sharp edges of the panels. We also added a ridge beam for additional stabilization. We used left over plastic to build the door, which we designed to be open partially or all the way.
In order to secure the plastic along the sides of the greenhouse, we sandwiched the plastic between a 2x2 and a 1x2. This allows us the option of either keeping the plastic on the ground (and covering the pallet vents) or easily propping it up to allow for more airflow on hot days.
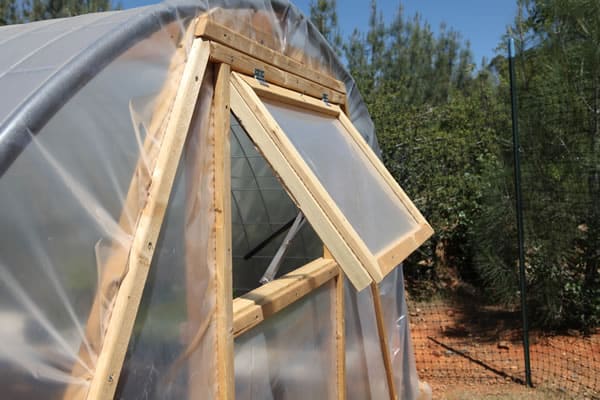
We then added a rear wall automatic vent opener. The window opens as the heat rises and greatly increases the airflow as it opens.
The Results So Far
Once we completed the greenhouse and started migrating indoor seed starts into it, we were very pleased with the amount of space and possibilities for configuring benches and growing beds/containers. We started of with using some plastic folding tables we had used at a farmers market booth and also used a donated folding bedframe that our friends had lying around. These will be used until we salvage the materials and time to build some permanent wood benches in the inside. We are planning on using 55 gallon water barrels for the bench legs/support. This will provide us with both a thermal mass for nighttime heat retention and also a source for emergency water storage. An extra bonus of the greenhouse project.
With two months of use under our belt, the plastic has stayed very tight and is holding up very well. There is no noticeable sag in the roof and the walls have withstood some pretty strong winds. We have noticed that a lot of insects get caught under the plastic but don't seem to be causing any problems yet. If the doors get left shut too long in the morning and temperatures really begin to rise, a layer of moisture will begin to collect. Our little DIY greenhouse seems to be very secure and rigid.
Our next big challenge is to deal with the summer heat and determine is we want to try using shade cloth to keep temperatures down in the hot summer months or to remove all the plant material and pause use of the greenhouse until August and September when temperatures will begin to fall again. We are currently leaning towards finishing up seed starts in the greenhouse and then get some new starts going later in the season. We might also put a few wine barrel containers in place for growing some produce throughout the winter. Fresh gardens tomatoes in January!
With the results we have so far and the experience of building this first greenhouse on a limited budget, we would recommend this type of greenhouse structure to anyone wanting to get a greenhouse in place and grow lots of food year-round. We welcome your thoughts, comments, and ideas on how to make this structure better and look forward to posting updated pictured and notes as the year progresses.
~ Three Meals Farm
This is a companion discussion topic for the original entry at https://peakprosperity.com/building-a-cattle-panel-pallet-greenhouse/