This is a story of one of the steps my family has taken towards increased resiliency, including actions taken to build a more sustainable lifestyle and invest in our food security. My family lives on mostly a vegetarian diet. We currently grow a large garden and plan to grow most of our food for the full year. Growing a year's worth of food brings up many questions, but the most critical one is how do we preserve the bounty of our garden? Of methods that I know of, one can dry, ferment, can, or use cold storage. Canning heats the food and takes away some of the nutrients. Not all foods can be stored in cold storage (but I am working on this, as well). We have an Excalibur dryer but find it takes forever to dry things and the electricity to match.
So I decided to build a solar dehydrator. After researching different design ideas, I went with a design that I could use some recycled materials and materials left over from other projects, plus some new. I also wanted a high-capacity design that could dry a lot of food at once. This design has a heat collector and a tower.
Construction
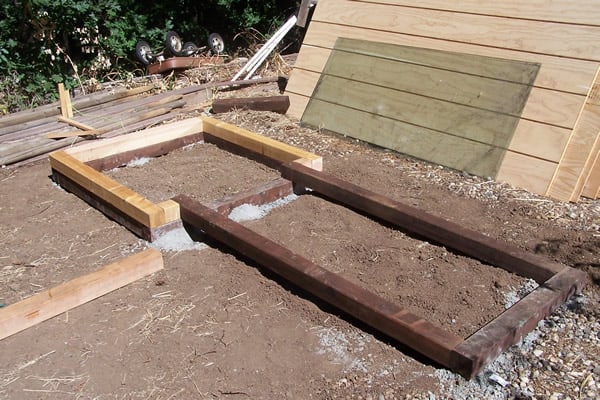
First, I built the foundation out of 4x4 pressure treated (PT) and some not PT. The wood that did not touch the ground did not need PT. The site was also at a slight slant, so I doubled the wood under the tower. The design has a 4' square tower and an area for the metal that is used for the heat collector mass. I dug trenches in the dirt, drilled screws into the 4x4's and filled the trenches with concrete. I set the 4x4's (with the screws down) in the trenches, then leveled the 4x4's and bolted the intersections together. Then I covered this with 1/2" plywood that I painted black.
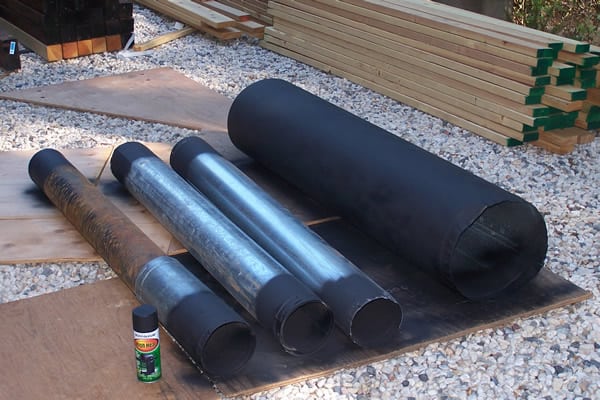
We have a shop in town that sells recycled construction materials (Habitat for Humanity Restore) that makes finding used materials easier for these types of projects. I was able to find three 5' long, 6" diameter, single-wall stove pipes and one 14" diameter single-wall pipe. The three 6" pipes fit nicely inside the larger pipe. I painted the pipes black with high temp paint (the same paint that you paint a woodstove with). I was going for as much mass as I could get to dry a lot of food at once.
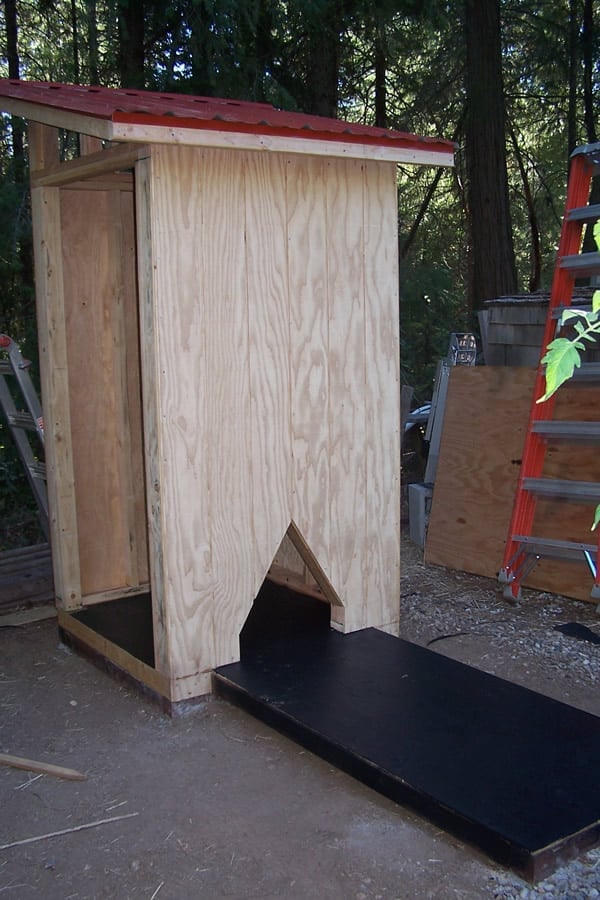
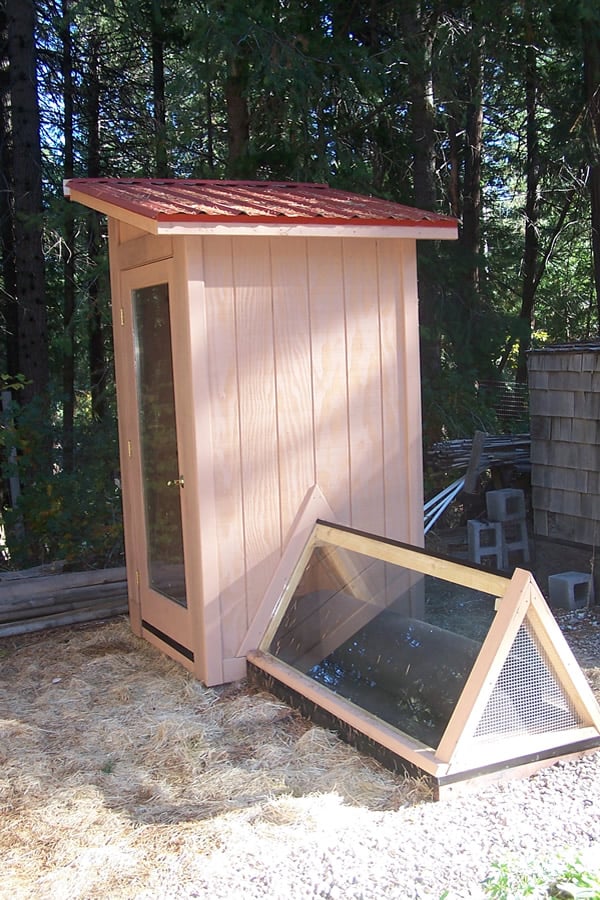
Next, I built the tower. I used 5/8" plywood siding, as I have this thing for making structures that not only function, but look nice as well. You could use 1/2" CDX plywood instead, if you chose. Since the plywood is 4' x 8', it took 3 sheets (the door is on one side). The framing, including the rafters was made from 2x4 studs. I was able to get a recycled 3' wide door with a full dual-pane window. This I framed in on the west side of the tower, so the food would not be in the direct sun, but you could see inside. (It could have also been in the rear.) The roof is slanted to allow for an exit vent in the rear. The exit vent opening should be approx. equal to the inlet opening. I covered this with galvanized welded mesh wire on the outside (for animals) and window screening on the inside (for insects). I covered the roof with 1/2" plywood and scrap metal roofing.
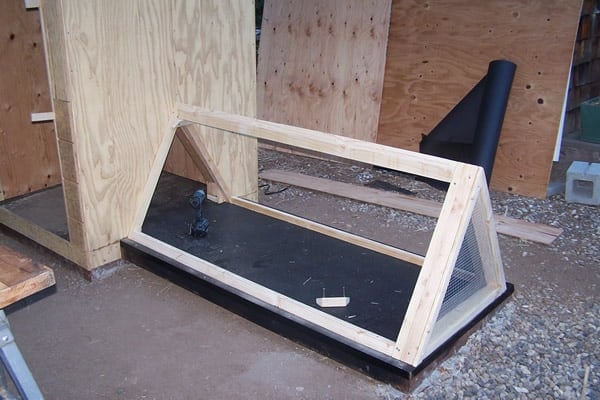
I went to my local glass shop and they had recycled (like brand new) 3/16" thick, tempered glass shower doors. I framed in a triangular box to hold the shower doors. This area became the heat collector area. Again I covered the inlet with welded mesh wire on the outside (for animals) and window screening on the inside (for insects). This could be flat, as well, with corrugated metal sheets as the heat mass. I made covers for the inlet and outlet for winter.
Cool air comes in the heat collector area, is heated by the metal, and flows up thru the tower and out the top rear of the tower. It works like a woodstove or greenhouse. Heat rises.
Now for the food trays: I made 10 frames out of 2" x 2" wood, painted with mineral oil. They are 3' square. The mesh covers an area of 2' x 3' (the mesh comes in 4' width, so I cut it in half). This leaves an area of 1' x 3' opening. I covered 3/4 of this opening with plywood. The opening is on the outside of the frame, away from the mesh. These are installed in a staggered pattern, with the opening opposite on each. This makes the air flow on both sides of the food and slows it down, as it makes its way up to the exit vent. The food is sliced thin and placed with maybe 1/4 to 1/2" between the pieces. This makes the hot air stay more on the bottom of the trays and move to the opening. The trays rest on angles mounted the inside walls of the tower.
Material for food trays: I used 1/4" mesh welded wire, type 316 stainless steel, to hold the food. This type of stainless is best for acid foods. It's expensive, but there are only two types of mesh that you should use for this: food-grade plastic mesh (which I could only find commercial grade) or type 316 stainless steel. (Window screen is fiberglass and can put fibers in the food; aluminum window screen adds aluminum to the food. So these should not be used.) The stainless mesh needs to be welded, not woven, as food can be caught in the weave. The stainless comes in 4' wide and sells by the foot. I needed 6 square feet (2' x 3') per tray x 10 trays = 60 square feet x $6 per square foot = $360.
Final Thoughts
The overall project came out nicely and the ability to use a lot of leftover and used building materials makes this type of project creatively adaptable regarding the design and size of the final dehydrator. The size of our system gives us the capacity to dry and preserve large quantities of garden produce with limited light exposure (we live in a mountain home) and maximize our harvest yields. Some of the other things we will be exploring with our system are:
- Creating an adjustable cover to regulate heat levels
- Adding a wireless thermometer to monitor temps from the house
- Evaluating temperature ranges and zones of differing heat levels within the tower.
I'm happy with how this project turned out, and I hope you will be inspired by my efforts. Do-it-yourself plans for capturing and utilizing solar energy are a solid step on the journey toward resiliency. I'm looking forward to increasing our year-round preserved food supply with homegrown dehydrated produce and dried fruit, and I look forward to sharing our experiences after we've used our solar dehydrator through another growing season.
This is a companion discussion topic for the original entry at https://peakprosperity.com/building-a-solar-dehydrator/