With the waning of the blistering summer heat comes the end of the life cycle for many of the summer crops planted in the garden and produce available at the farmers market. This means it is time for harvesting seeds for the next growing season and saving the promise of delicious produce for years to come.
One of the most rewarding and enjoyable seeds to harvest is that of the tomato fruit. From just one fruit, one can harvest dozens (if not hundreds) of seeds that can be stored and shared for years' worth of planting and propagation. After harvesting the seeds, the tomato fruit can still be eaten or processed for storage.
Saving tomato seeds is a rather simple procedure. It takes very little equipment and only takes a few minutes of active time over the course of few days. After you try harvesting your own tomato seeds, you will wonder why you have not been doing it all along. Soon you will only be buying new seed to try different varieties not available in your local seed exchange groups. Tomato seeds from your own garden also make great gifts.
How to Choose Tomatoes for Saving Seed
Before you rush out to the garden to get a tomato for this nice weekend project, there are a few things to consider.
- Hybrid varieties can’t be used.
Hybrid varieties are designed to produce only one generation of fruit that is true to the variety. If you harvest seed from a hybrid plant, the fruit from the next planting will most likely not be the same as the previous generation (F1 plants). Use an open-pollinated tomato variety that will produce the same fruit generation after generation. Heirloom types are open-pollinated varieties that have been around long enough to get an “heirloom” status and are a great way to go for saving seeds.
- Choose tomatoes that are ripe.
The fruit should be completely ripe, but not to the point where it is getting soft and oozy. Get tomatoes for seed-saving earlier in the season and don’t wait until you have that early frost and are rushing to save everything or only have over-ripe ones available.
- Select the best tomatoes you can.
Using the ideal specimen for a particular variety is the best way to ensure you have great success with next year’s crop from your freshly harvested seeds. You want to select the tomato that displays all the characteristics and qualities for the variety you are trying to save. Select fruit only from healthy, disease-free plants.
How to Save Your Tomato Seeds
The steps to harvesting tomatoes seeds are pretty straightforward. Have the following materials available and on hand to make things go smoothly.
Materials:
- A few fresh, ripe tomatoes of each variety you want to save. Doing multiple varieties at one time will help get the most out of your time. Again, try and choose the most perfect one – you will know it when you see it.
- Jars or cups (one for each variety)
- Water
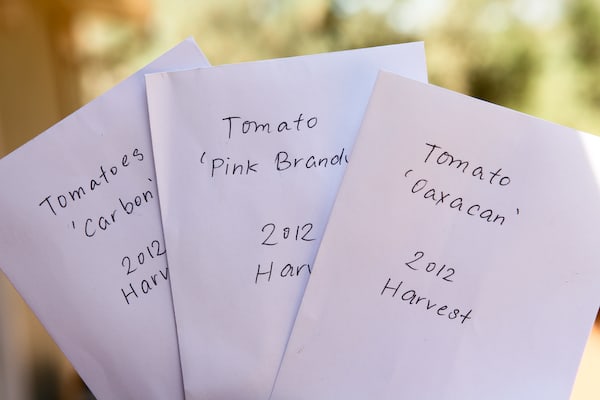
- Pen and labels for each variety
- Fine mesh strainer
- Glass or ceramic plates (one for each variety)
- Envelopes (one for each variety)
Steps
- Harvest or purchase your perfect tomatoes selected for seed saving.
- Label your jars with the variety of tomato you plan to use for each jar.
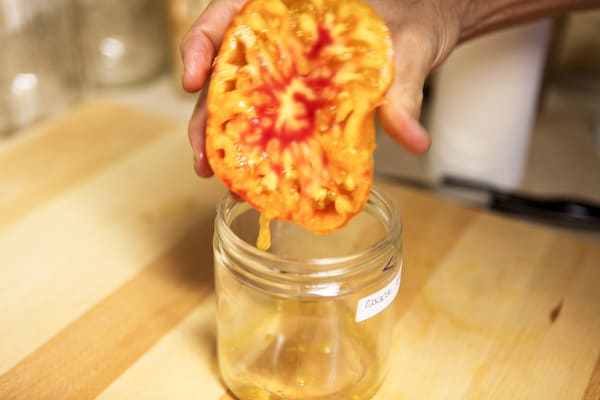
- Cut the tomato in half (along the equator).
- Squeeze the seeds, gel, and juice out into your jars or cups. Put the tomatoes aside for another use. If using cherry tomatoes, they can be placed into a blender or food processer until the tomatoes are mashed up.

- Add enough water to double the amount of the liquid in each jar (equal parts tomato juice to water).
- Place jars in an area where they won’t be disturbed for 2-3 days.
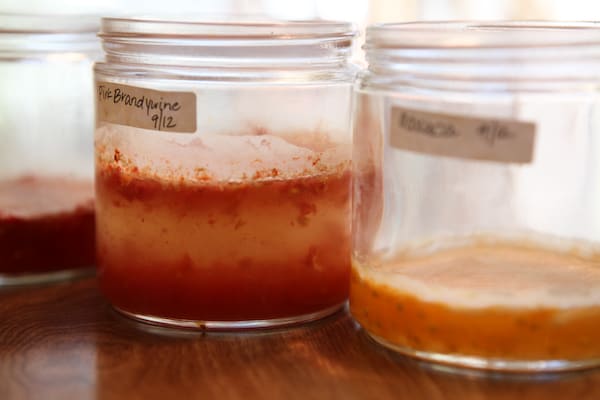
- Check periodically starting on day two, and look for a mold layer forming on the surface of each container. Once the mold layer has formed, you are ready to strain it off. The fermentation/molding process dissolves the gelatinous coating on the tomato seeds, making them easier to germinate later on.
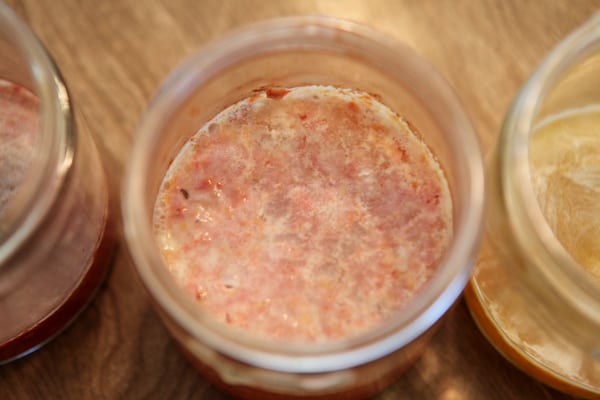
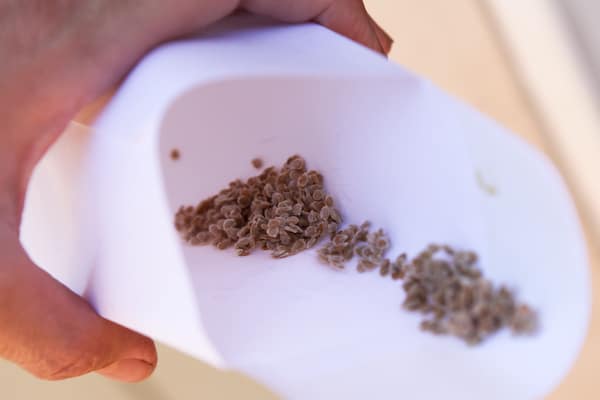
- Carefully pour off the mold layer (seeds should be on the bottom of your jar) and strain and rinse the seeds with cold water. Gently clean them thoroughly to remove any remaining gel and tomato bits.

- Shake the strainer dry as much as possible, wiping a paper towel or dish cloth onto the bottom of the strainer to absorb as much moisture as possible. Dump out the seeds onto a glass or ceramic plate. Some sources recommend using a paper towel or newspaper, but years of experience has taught us that using a ceramic plate works great.
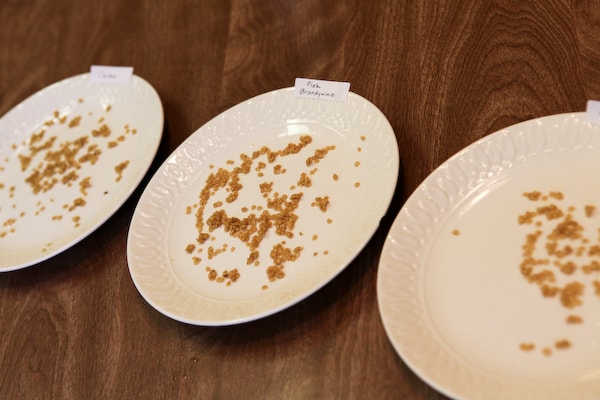
- Allow the seeds to dry thoroughly. If you live in a humid environment, a fan can help speed the process. Stir or mix the seeds a couple times a day until they are thoroughly dry.
- Once they are fully dry, transfer them to a labeled envelope or container and store with your other seeds. Tomato seeds will remain viable for 4 to 10 years, depending on the variety and your storage conditions. Seeds like to be stored dark, cool, and dry.
As you can now see, saving tomato seeds is very simple and very rewarding. Harvested seeds make great gifts to new and experienced gardeners (you will have plenty of seed to share) and you will not have to purchase new seed for years to come. By saving your own seed, you also help preserve genetic diversity for generations to come and allow for access to regional varieties to be available to friends and neighbors. So I invite you to try your hand at saving seed this Summer and Fall and welcome your comments and the sharing of your experiences with this fun garden project.
~ threemealsfarm
This is a companion discussion topic for the original entry at https://peakprosperity.com/how-to-harvest-and-save-tomato-seeds/