The garden beds are dug. The soil has been amended with organic compost and natural fertilizers. Plants are in and starting to grow. All they need is the warming rays of the sun and plenty of water. Ensuring that my plants get enough water while being mindful of water usage in now my main priority. It is time to install a drip irrigation system for the first time.
I walked into the hardware store only having a tiny idea of what I was doing. If you feel a little bit or totally lost about irrigation, then this article is for you. If you are hoping to put a drip system into a small gardening or farm area, then this article is for you. There are many ways to install drip irrigation systems and there are lots of options. The system I setup is for the frugal gardener and farmer looking to put in an inexpensive drip system. You can do irrigation for your garden using this method with only about $50. Prices vary but I spent $43.64 for my garden. (A special thanks to B&C Hardware in Grass Valley. They were really helpful!)
Your shopping list:
-25 feet or so of 1/2 inch plastic piping
-50 feet or so of 1/4 inch piping
-One hole puncher
-A few 1/2 inch compression adaptors that will attach to a hose.
(This is the part that attaches to your watering hose. Think about how many sections you hope to water and buy as many. In other words, for every section of your garden that you are hoping to water and foster a drip system, you’ll want a different adaptor. It plugs into the piping and you can move the hose. If there are three different places that need a drip system, buy three different compression adapters. Your hose will easily attach to the adapters and you can move it around.)
-25 or so “stay-put” wire anchors to hold your piping in place.
(I’ve used one for about every three feet of piping and that has worked for me. If you are into a more exact restraint system, you may want a few more anchors.)
-Support stakes or drip anchors.
(These are different than the stay-put anchors. They hold the drip attachment up and in place.)
-Hose end clamps*.
(They come in packs. You will want as many as you will have sections to tie off. *Full disclosure: This is the one piece of manufactured irrigation equipment that I have hesitation recommending. The clamps are supposed to kink the ends of the 1/4 inch piping and lock it. They don’t have a great reputation and most of us end up using tape or wire to kink off the ends because the clamps generally leak. Please keep that in mind when buying this product.)
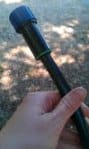
-1 pressure regulator.
(Unless you will be using multiple hoses at the same time, you will only need one. This part is essential and expensive but, again, most people will only need one. You can move it, so don’t buy unnecessary extras. Most household watering systems, even if on a well, expel more gallons per minute than a drip system can handle. So you will need this part in order to maintain your drip system without damaging all your other components.)
-Several 1/4 inch double barbed connectors.
(I started with ten and then ran back to the store to buy 30 more. This is the part that will decide how many watering arms you will have. So be liberal.)
-Dripper attachments.
(For every connection that you make, you will need a dripper attachment at the other end. Unfortunately, this is the one thing that I can’t give solid advice about. The attachments are the most nondescript item when it comes to irrigation. It begs the farmer’s preference. There are several different varieties. Depending on how much water you hope will spill out, your dripper attachments, or drip heads, will vary. When you are at the store, you will notice several varieties: sprayers, drippers, etc. You may have to experiment and see what works best for you and your garden personally. Some of them drip a few drops at a time. Some of them squirt water in a stream. Some of them spray a nice mist. Be willing to experiment and keep your receipts.)
The steps:
1. Pick a central place for your drip system. Decide the length you want for your 1/2 inch piping and place it in your garden. Remember that you are setting a foundation with the 1/2 inch piping and that you will be attaching arms to the piping. Pick a central spot in the area that you wish to water. This isn’t a soaker hose. You are actually placing a system.
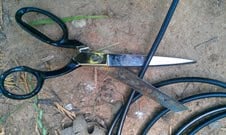
2. Cut the piping appropriately and kink off the end, securing it with a clamp. (If leaking occurs, tape or wire the end, once kinked.) Your 1/2 inch piping can be many feet but can lose pressure and watering efficiency if several feet long. If you find that you are trying more than 30 feet, you might want to add a second length of 1/2 inch piping.
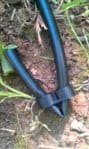
3. Firmly press the end of the 1/2 inch piping into the compression regulator (the part that attaches to the hose.) You only need to go about an inch deep and it will be secure.
4. Secure the chosen length of 1/2 inch piping with the anchors so that it doesn’t coil for the next step. Make sure the end that you want to attach to a hose is accessible to a hose.

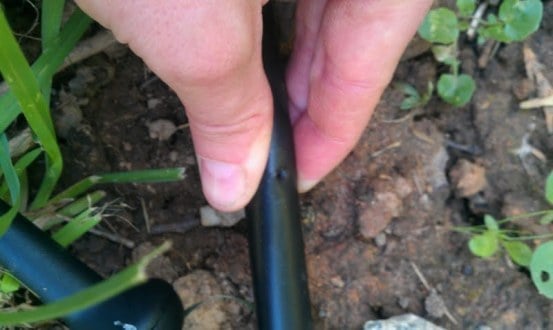
5. Once the 1/2 inch piping is in place, punch holes in the piping to attach the arms. Think of it like a great octopus with many legs that will provide water for your garden. Punching the holes is hard. I bought the cheap hole puncher where I had to screw it in and it took me about 5 minutes per hole. This was my least favorite part. The holes can be on either side of the piping and they do not necessarily have to be equidistant from each other. If you find that you are wanting more than 3-4 arms for every foot of 1/2 inch piping, it may be best to add another line.You’ll want to squeeze the piping so that you are able to make a clean punch and don’t accidentally punch through both sides.
You’ll want to squeeze the piping so that you are able to make a clean punch and don’t accidentally punch through both sides.
6. Cut your 1/4 piping to the appropriate lengths for where you want the water to spray. Remember you can always cut shorter if they are too long but if you cut them too short, you are stuck with the length.
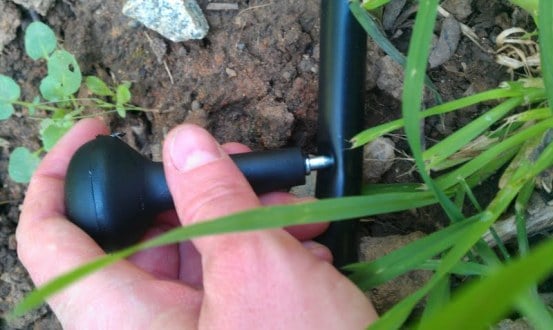
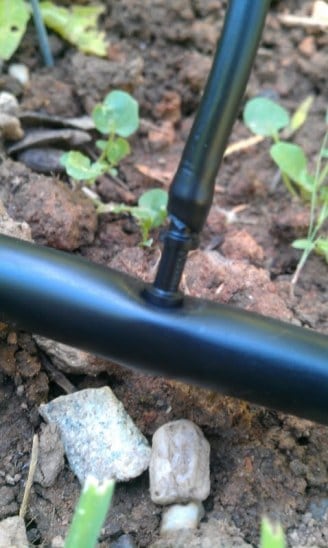
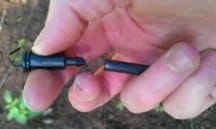
7. Wiggle a double-barbed connector into one end of the 1/4 inch piping.
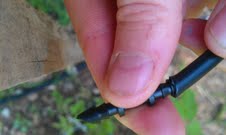
Stick the other end of the barb (now attached to piping) into one of your punched holes in the 1/2 inch piping. It will pop when it’s in place.
8. Place a sprayer head on the other end of the piping.
9. Place a support stake where you want to mount the sprayer and secure the sprayer. Repeat steps 7-9 for as many arms as you are wanting for your drip system.
10. Connect the pressure regulator to the compression regulator and then attach the hose to the pressure regulator. Turn your watering hose on just a little bit at a time until all sprayers have an even flow.
That’s it! You have a drip system!
Check your system frequently for leaks and to see if any of the sprayer heads have clogged or popped off. If a sprayer head is clogged, it can usually be cleaned out with a bent paperclip and put back.
Not often, but occasionally, critters will chew a hole in your piping. More often than not, the critter in question is the family dog. It is important to be sure that you watch your dog around your drip system. If a critter does chew a hole in your piping there is an attachment to fix it. It looks like the compression regulator but with no hose attachment, just a place to press two sides of piping. If damage is minimal, you can cut the damage out and place the clean piping in the attachment.
Having drip irrigation is a great way to save water and produce greater yields of produce for you to eat. I highly recommend installing a system and look forward to hearing about other member experiences and system setups.
- Hilary Hodge
This is a companion discussion topic for the original entry at https://peakprosperity.com/installing-a-drip-irrigation-system-2/


 Zones, zones, zones! Have as many zones as you can afford and justify. You really want to be able to turn water on and off to individual beds. Using the integrated tubing, the valved manifold connectors are incrementally cheap over using non-valved connectors. This way, you can "retire" a bed early in the season while continuing to water other beds.