 Making your own yogurt at home requires no fancy equipment and is quite simple. Starting with fresh, raw goat or cow milk gives you the very best quality and nutritional value, thanks to the live food enzymes and active beneficial bacteria (probiotics) preserved in the final raw yogurt. Consuming probiotics on a regular basis is one of the best things we can do for our health and immune system.
The benefits of making your own yogurt are many. It is extremely economical, it reuses glass containers instead of buying plastic over and over again from the store, and you have control over the final product. (And if you want to consume a raw milk yogurt, this is probably the only way). The end result is all-natural, super fresh, incredibly healthy, and delicious!

Equipment and Ingredients
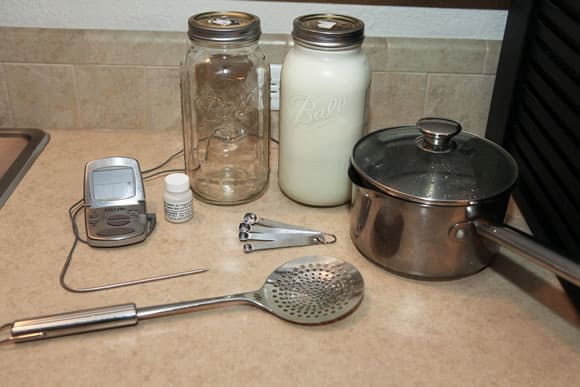
- ½ gal fresh raw goat or cow milk (store-bought pasteurized milk can also be used, but it will need to be pasteurized again prior to adding the yogurt culture)
- yogurt culture or yogurt made from pasteurized milk (store-bought yogurt is fine, but make sure to purchase organic, plain whole milk yogurt with live cultures)
- measuring spoons
- sauce pan
- jar
- thermometer
- incubator (there are many ways to incubate your yogurt; we will discuss later)
Method
Step 1. Clean & Sterilize
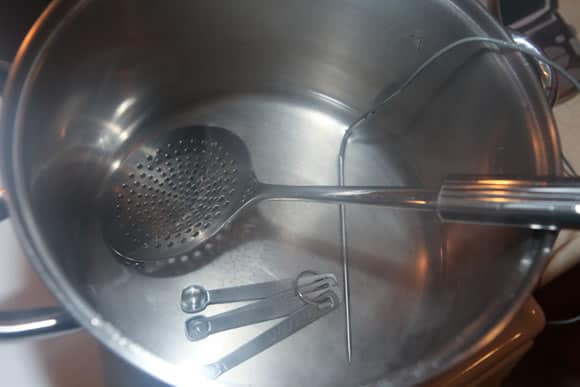
The first and extremely important step is to clean and sterilize. It is imperative that everything that will come into contact with the milk (saucepan, mason jar and lid, measuring spoons, stirring spoons, thermometer, etc.) is scrupulously clean.
We prefer the steam sterilization method because it is easy, effective, and is not dependent on any outside chemical sterilizers (bleach is one example). Simply place a couple of inches of water in the bottom of a stockpot, then put in your measuring spoons, stirring spoons, and thermometer probe. Cover your stockpot, and steam sterilize for about 8 – 10 minutes. To sterilize our mason jars and lids we run them through a hot cycle in the dishwasher.
Alternatively, you can sterilize with bleach or a commercial sterilizer used for dairy equipment or beer making.
Step 2. Heat the milk
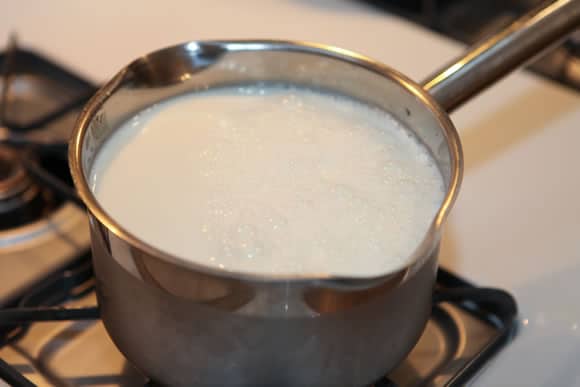
Gently heat the milk in a sterilized saucepan or double boiler. If you would like to keep the final product raw, heat the milk to 108° – 112° (live enzymes die at 118°). We aim for 110° and then move on to Step 3. If you are lucky enough to have your own goats or cows for milk, you can also use fresh milk from the morning or evening milking, just after being filtered and before it gets refrigerated.

If you are using pasteurized store-bought milk or would like to pasteurize your own milk, heat the milk up to 180° - 200° and hold it at that temperature for about 10 minutes, and then allow it to cool to 112° - 115° before adding your culture.
Step 3. Add your culture
Put your culture into your sterilized jar. If using store-bought yogurt (or yogurt made from a previous pasteurized batch), use about 2 heaping tablespoons. We use a culture available from Dairy Connection, which requires 1/16 tsp per 1/2 gal of milk. Most natural food stores also carry a yogurt culture. Check the manufacturer’s instructions for amount to use.
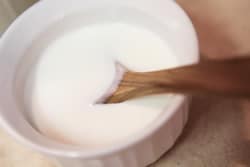
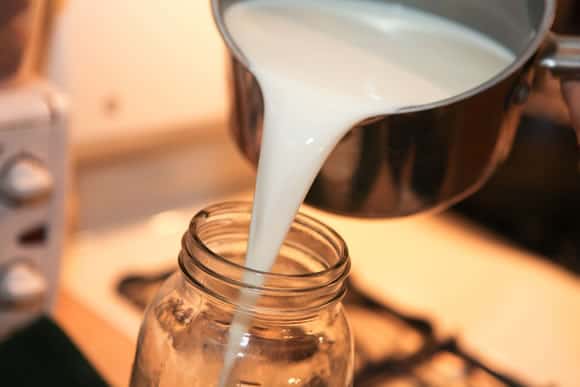
Pour a small amount of your gently heated milk into your jar with you culture, put on the lid and shake well. Add the remainder of your warm milk, and shake well again to mix thoroughly.
Step 4. Incubate

There are many ways to incubate your yogurt, with the main goal of being to maintain a temperate of 110° for 8-12 hours, or until the yogurt has set up and thickened.
- Cooler method
Fill a cooler (large enough to hold your jar) with warm water, and place your jar within the cooler. Put the lid on, and wrap the cooler with towels. Keep in a warm place for 8-12 hours.
- Oven method
Place your jar into an oven with the oven light on.
- Use a commercial yogurt maker.
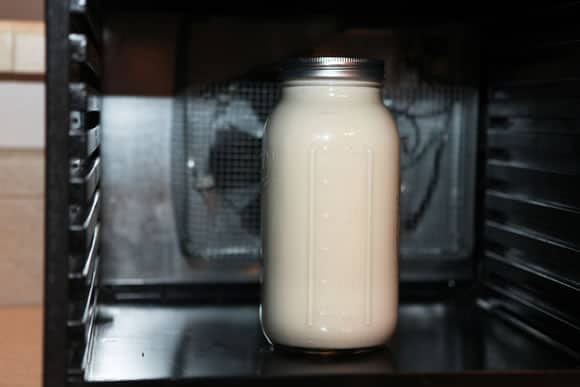
- Food Dehydrator
This is the method we use. We have an Excalibur Dehydrator and it works great for incubating yogurt. Simply place your jar within your dehydrator and set the temperature to 110°.
Check your yogurt after 8 – 12 hours. Tilt the jar slightly to see if the yogurt has thickened. Keep in mind that it will thicken even more after being refrigerated, but raw milk yogurt will not be as thick as commercial store-bought yogurt. If you prefer a thicker final product, the yogurt can be strained through a cheesecloth-lined colander. We enjoy it just as it is!
Resources
Yogurt cultures from The Dairy Connection - http://dairyconnection.com/commerce/catalog.jsp?catId=11
Yogurt cultures from Cultures for Health - http://www.culturesforhealth.com/starter-cultures/yogurt-starter.html
Excalibur Dehydrator - Special Offer at PrepareDirect
The benefits of good gut bacteria - http://www.medpagetoday.com/InfectiousDisease/GeneralInfectiousDisease/11343
Where to find raw milk, plus information regarding raw milk - http://www.realmilk.com/where2.html
Local food resource - http://www.localharvest.org/
This What Should I Do? blog series is intended to surface knowledge and perspective useful to preparing for a future defined by Peak Oil. The content is written by PeakProsperity.com readers and is based in their own experiences in putting into practice many of the ideas exchanged on this site. If there are topics you'd like to see featured here, or if you have interest in contributing a post in a relevant area of your expertise, please indicate so in our What Should I Do? series feedback forum.
If you have not yet seen the other articles in this series, you can find them here:
- Growing your own potatoes (woodman)
- Considering Data Backup (jasonw)
- Selecting a Firearm (Aaron Moyer)
- The Basics of Growing Garlic (karenbyler)
- Using & About Oxygen Absorbers (deniskorn)
- Vermiculture: Getting down and dirty with worms (jasonw)
- Starting your investment plan (Travlin)
- Getting In Shape: The New Me (cmartenson)
- Slow Money: Getting the “Numb” Out of Numbers (woodytasch)
- Preserving Meat By Curing and Smoking (DanJab)
- Raising Children in Changing Times (DianneM)
- Argentina: A Case Study in How An Economy Collapses (FerFAL)
- Wood Gasification: An Intriguing Emergency Fuel Source (Dutch John)
- Whole Food Eating (Teresa Piro)
- The Case for Small Scale Biofuels (Ready)
- Preparing for Economic Collapse (FerFAL)
- Buying a House in Today's Market (Patrick Killelea)
- How To Increase The Energy Efficiency of Your Existing Home (zeroenergy21)
- Fortifying Yourself And Your Home Against Crime (thc0655)
- Food Storage Made Easy (Adam)
- Quick Primer on Contamination Control Measures (Dogs_In_A_Pile)
- Practical Survival Skills 101 - Understanding Emergencies (Aaron Moyer)
- How to Explain the Current Economic Situation to Friends & Family (rhare)
- Managing Pain Without Meds (JAG)
- Protecting Yourself Against Crime and Violence (thc0655)
- Cultivating Inner Resilience in the Face of Crisis (suziegruber)
- Problem Solving: Improvise, Adapt, Overcome (Mooselick7)
- Extending the Harvest in Your Home Garden (Woodman)
- Practical Survival Skills 101 - Obtaining Shelter (Aaron Moyer)
- Woodworking (bklement)
- Making Soap (maceves)
- Small-Scale Beekeeping (apismellifera)
- Practical Survival Skills 101 - Water (Aaron Moyer)
- Prepping on a Shoestring (Amanda)
- Making the Urban-to-Rural Transition (joemanc)
- Dealing With a Reluctant Partner (Becca Martenson)
- Raising Your Own Chickens (Woodman)
- Practical Survival Skills 101 - Fire Starting (Aaron Moyer)
- A Quiet Revolution in Bicycles: Recapturing a Role as Utilitarian People-Movers - Part 2 (Cycle9)
- A Quiet Revolution in Bicycles: Recapturing a Role as Utilitarian People-Movers - Part 1 (Cycle9)
- The Keys to Transitioning Healthcare: Empowerment, Education, & Prevention (suziegruber)
- Installing A Solar Energy System (rhare)
- The Essential Gardening and Food Resilience Library (Old Hippie)
- Creating Healthy Snacks from Your Garden (EndGamePlayer)
- Peak Certainty, Food Resilience, and Aquaponics (Farmer Brown)
- A Case Study in Creating Community (SagerXX)
This series is a companion to this site's free What Should I Do? Guide, which provides guidance from Chris and the PeakProsperity.com staff on specific strategies, products, and services that individuals should consider in their preparations.
This is a companion discussion topic for the original entry at https://peakprosperity.com/making-fresh-raw-yogurt-at-home-2/