Making Potting Mix

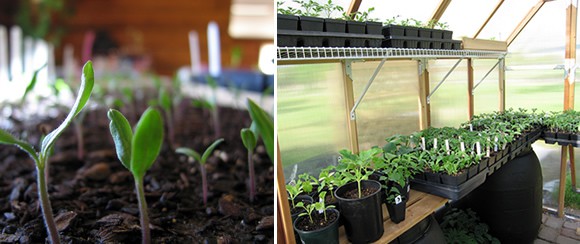
With spring upon us and the warming of the earth, many readers are getting the urge and itch to get outside and start planting a garden. Whether your garden is large enough to feed a community or just big enough to supplement your everyday fresh greens addiction, at some point you will need a supply of potting soil. From container herb gardens to the square-foot garden method, potting soil will need to be on hand. High-quality potting soil is an essential component to a successful garden season because it provides the foundational medium in which your plants will start and continue to grow in. In this article I discuss the process and recipe that I have used for many years for making great potting soil.  I hope to provide you with ideas on how to make the best mix for your garden and ways to save money in the future. 

The Recipe

The following is an excellent general seed starting mix and transplant mix.  For plants that might require a lighter mix, use a 2-1-1 ratio of the following ingredients.

Mix the following ingredients together in a sealable bag or container to maintain moisture if potting mix is to be stored for any length of time.
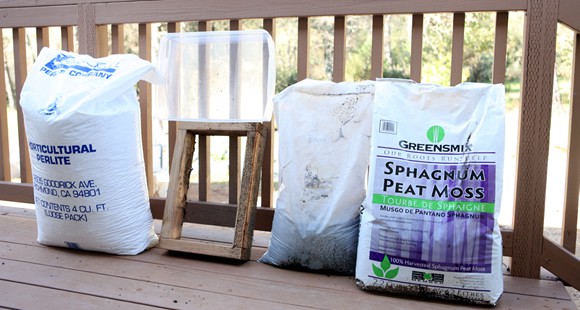
  • 3 parts Peat Moss
  • 1 part Compost (can be a combo of compost and worm castings if you have a worm bin available)
  • 1 part Perlite

Making the Mix

Step 1) Gather all ingredients in one location to make mixing easy and have everything readily accessible to make additional soil as needed.  For small batches, a nice potting bench can come in handy, or for really large batches, you can setup multiple trash cans with a larger screen for sifting the peat. 


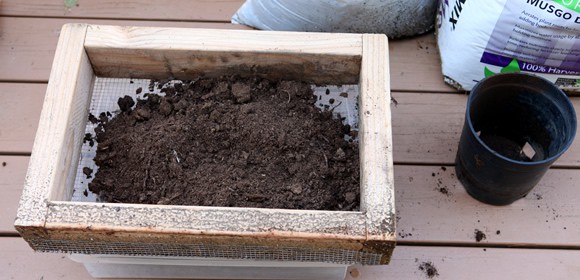
Step 2) Sift the Peat Moss to filter and break up larger solid chunks and sticks.  This is important for making a lighter, fluffier mix for seedling starts and seed trays. I use a sifting screen made of 2x4s and hardware cloth to push and rub the peat through to make a consistently fine peat component. Wear a dust mask and gloves during this part.

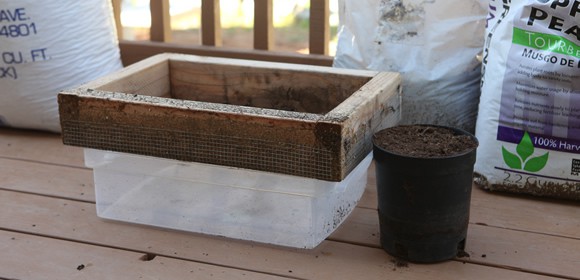
 Sifting box made for smaller tubs and containers

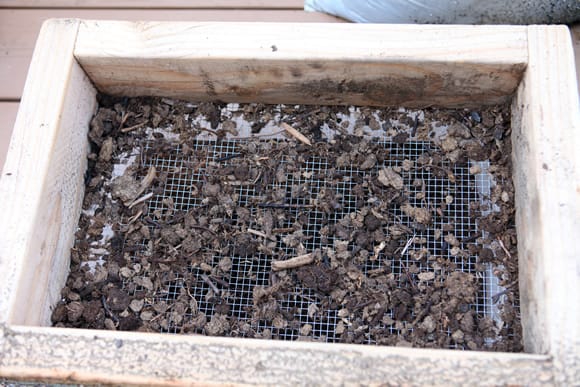
Add the bigger stuff to your compost pile or use it at the bottom of large growing flats as filler.


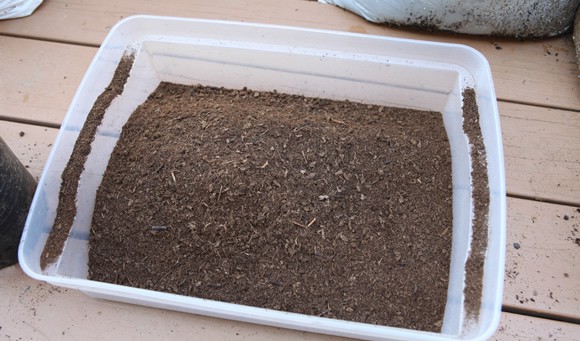
Nicely sifted peat moss. 
 

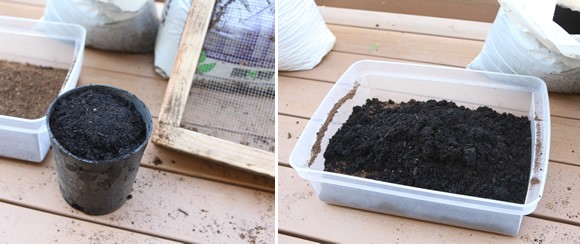
Step 3) Add the Compost Component - Use a high quality commercial compost if available to help avoid weed seed and to make sure you have good nutritional support for your potted plants.  If you are making your own compost, try to use the most seasoned and rich part of your pile.  You can also add and use worm castings as a supplement to this part of the mix. 


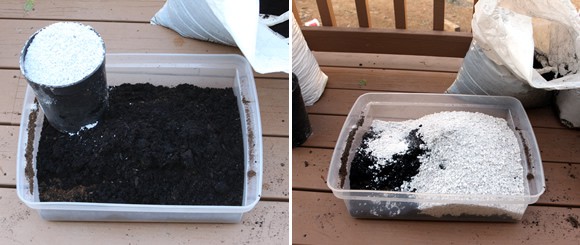
Step 4) Add the 1 part perlite to your mix.  Please note that the perlite will flow through a container with holes like these gallon planting pots pictured here and you need to take care not to make a huge mess when doing the transfer from the bag to you mixing container.  Also, I try to do this transfer quickly and gently to avoid it blowing around and breathing it in.  A dust mask can be a valuable asset to have if you are making a large quantity of potting mix.  As noted previously, I wear a dust mask (N95) while sifting the peat moss which can produce a lot of fine dust as well. 


Step 5) Once all the components are combined, mix thoroughly to distribute all the components.  For small batches I use my hands to mix the layers.  For larger batches I will use a couple of really large tubs or trash cans with lids to mix and slosh around.  The final result should look like the wonderful mix pictured below. 

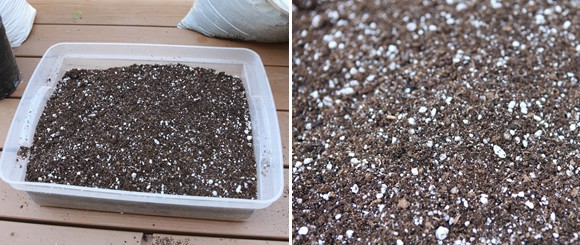
The finished product.  Now the hard part - picking which seeds to plant!

Considerations:

Peat Moss vs Coco Coir

On many gardening forums and discussion boards there is always a debate about the pros and cons of different base materials like peat and coir.  Much of the debate centers around which resource is more sustainable and a better choice for environmental reasons.  I don't yet have definitive beliefs or data to enter this debate.  My main goals for making my own potting soil are three fold:

  1. know exactly what is in my potting mix. 
  2. It is more cost-effective to make my own than buy bags in the volume that I use. I have reduced my waste stream by purchasing ingredients in bulk. 
  3. I know that this combination of mix gives me excellent, proven results and has produced wonderfully healthy plants every time, reducing my dependency on buying from plant nurseries and local plant sources.

Always keep in mind that we are all trying to support a more sustainable, long-term method of living healthy lives and becoming more resilient.  Alternative methods that support that goal are always more desirable.  Renewable and sustainable options are always welcome. 

Perlite vs. Vermiculite

 A few points about the similarities and difference between perlite and vermiculite

  • Both are extremely light, non-toxic, sterile substances.
  • Both will help reduce the density of your soil and make it easier for plant roots to grow.
  • Vermiculite will aborb and retain water better than perlite.  (Need water retention? Use vermiculite.  Need better water drainage? Use perlite.)
  • In our area, perlite is less expensive and much easier to acquire. We also need the added drainage that perlite provides due to heavy clay content in our soil.


I hope this article gives you some inspiration to get your hands dirty and get that garden going.  Having a reliable and effective potting soil mix can really open up the possibility of grow new varieties of plants and trying out unique seed selections.  Gardening is always a learning process.  Please share your methods and experiences with making soil and let us all have a wonderful growing season. 

Cheers,

Jason

This is a companion discussion topic for the original entry at https://peakprosperity.com/making-potting-mix-2/

Good read…thanks for the writeup.
Last year, I used a commercial mix and my tomatoes and peppers were very slow to develop. This year, I used the Burpee Seed Starting kit, available at Home Depot. For transplanting into individual pots, I am using the Mel’s Mix from the Square Foot Gardening book, which is composed of the same ingredients as your mix, more or less. I first added some compost in the SFG box outdoors, mixed it up and then added it to my individual pots. My tomato and pepper seedlings are growing like crazy. I’m aiming for a mid-May planting, weather permitting, but my tomato plants could probably be planted in a week or so, and they are only a month old.

Great write up Jason.  That’s pretty much the mix ratio we use in our SFG beds and we have had great success year over year.  One additional thing we add every now and then is a half bag of mushroom compost to each 4’ x 4’ x 12" bed,   It really sweetens the mix and the tomatoes, peppers and cukes really seem to do well with it.
One question I have after reading a comment safewrite (I think) made in the Definitive Permaculture Agriculture thread…she had a soil analysis done and it came back with too much organic material content so she ended up adding masonry sand with great success.

Any thoughts on adding sand or rock dust in from the start? 

 Now, how about some info o that greenhouse I see in the last photo?  Did you build it yourself?  Kit, or from scratch?
 

Viva – Sager

 I just made up a batch of potting soil tonight, based on Eliot Coleman’s recipe in The Four Season Harvest, to start some tomatos in soon.
3 buckets peat mostt, 3 buckets compost, 1 bucket perlite [I used vermiculite since I had some], and 2 cups organic fertilizer blend.  I made the fertilizer blend from a mix of greensand (for potassium), rock phosphate (for phosphorus), and cottonseed meal (for nitrogen).

I finally figured out how to get nice thick stemmed tomato plants.  To avoid the long and leggy thin stems, the plants have to get enough light outside and not be just left on the windowsill.  Brushing the plants, or or enough wind to move the plant is also supposed to build stronger thicker stems. 


Great read, Jason!
Vermiculite can also harbor asbestos. If you use vermiculite, definitely use a mask. Perlite is a volcanic glass containing a small percentage of entrained water. When heated sufficiently, it produces the "popcorn rock" we call perlite.

I’ve been making soil for years with my compost, perlite, and sandy soil. I’ve tried growing strawberries in pure worm compost (vermicompost), and they performed wonderfully; however, it wouldn’t be as cost effective if I had to buy the vermicompost. From what I’ve read, a 5:1 ratio of regular compost to vermicompost produces the most cost effective blend to feed plants. Perlite and peat moss keep the soil airier and provide a rooting medium.

Let the plants tell you what they need. What problems did you encounter last year? The internet is a great resource to interpret what the plants are telling you. Here is the first article that Google suggested when I searched for "purple leaf nutrient deficiency". http://gardening.about.com/od/gardenproblems/a/NutrientDeficie.htm. Too much fertilizer is worse than not enough, and cold conditions can mimic nutrient deficiencies. Don’t fix the wrong problem or you’ll create another problem.

If you’ve got a big enough garden, try dissolving a little epsom salt (MgS04) in water that you periodically apply to select plants. (If your memory is as bad as mine, you’ll want to somehow mark which plants receive which treatments.) Unless your medium is too rich in magnesium, the plants will be stronger. Also, sulfates tend to enhance the flavor of the fruits. Again, don’t overdo it! As an example of overdoing it, if you’ve got blossom end rot on your tomatoes, you need more calcium. If you add epsom salts, you’d make the problem worse. In this case, gypsum (CaSO4) works better. Ideally, you’d have 11 times as much calcium as magnesium. If you know how to listen, the plants will tell you what they need.

Good luck and good gardening,

Grover

Thank you Jason for another useful and practical post.   I have been container gardening for a few years and I find that many bagged soils are too dense, I have bought perlite this year to add to my potato planting mix. I have used the Burpee seed starting mix this year and it worked very nicely but it is almost impossible to wet it down so that has to be factored into next year’s seed starting. My best results so far with all my nightshades and herbs has been with Miracle Gro potting soil in the yellow bag (I know it is probably just for house plants but found it on sale at KMart) and Jobs fertilizer spikes.    The vegetable plants grew like wild and gave best yields ever. I would prefer making my own soil though, it gives you more control over the chemicals and fertilizers in the soil and I imagine it would be cheaper.  I intend to try it next year.
Denise

Although I’m sure this potting mix works great, I have a big problem with both the use of peat moss and perlite.  Both easily fall into the category of non-renewable resources, which sound be a paramount concern.  I’d recommend the use of rice hulls instead of perlite first off (which is readily available in bulk in my area - Southeast PA) and second I’d ditch the peat moss for coconut fiber (coir).  While both rice and coconuts are not native to many areas, these byproducts are, at least, renewable. 
I’ve started seeds using rice hulls, coir, and my own compost and they’ll always come out just fine.

Also, too much nitrogen can cause them to be leggy and leafy, rather than fruity. But your recipe doesn’t seem to have that problem.

[quote=Cistern]Although I’m sure this potting mix works great, I have a big problem with both the use of peat moss and perlite.[/quote]So do I.

That might work now, while trans-oceanic shipping is cheap and plentiful, but in a few years? We’ve gotta do better than that!
I’ve been using woodstove charcoal in place of vermiculite or perlite. But it can initially drain nutrients, so I pre-charge it by soaking it in urine.
(Just get over the "yuk factor;" urine is a huge source of nitrogen. It always amazes me that people will plunge their hands into compost – what is essentially rotten food – and squirm in disgust if there’s some urine – which is sterile – in the mix.)
However, I don’t have a good replacement for coir. I have been considering shredded bark, but the only bark we have readily available is cedar, whith contains thujone, a potent herbicide. Too bad – shredded cedar bark has the perfect consistency.
Here’s what we’ve been using in our soil blocks:
8 litres garden soil
8 litres compost
2 litres coir
1/4 litre charcoal soaked in urine
1/4 litre dry woodstove ash
1/4 litre bloodmeal
1/4 litre greensand
I highly recommend soil blocks for starts over plastic pots. Plastic pots are made of petroleum and don’t last long before they’re in the landfill. Soil blocks are healthier – no transplant shock, and no "root bound" problems.
We use 8 cc and 125 cc soil blocks. The "micro" blocks are cubes about 3/4" on a side. The "mini" blocks are cubes about 2" on a side, with a dibble for receiving the 8 cc blocks.
We now have over 12,000 seeds in blocks.

The April/May edition of Mother Earth News has an article on container veggie gardening that says fully composted sawdust or chipped bark, rotted until black, makes a fine substitute. Two parts rotted sawdust or chipped bark to 1 part compost is the recommended planting mix.

Thanks for very good information on  Making Potting Mix,